Minecraft Overviewer on an Azure storage static website
I recently started a Minecraft server on a cheap Azure VM. I like to run Minecraft Overviewer to generate a fancy map. The rendered map looks like this, you can scroll around and zoom, it’s great:

I’m serving the map from an Azure Storage Account using the static website feature. I’ll go through how I’ve set it up:
- Render the map on the same machine as the Minecraft server (saves copying files between machines)
- Upload to Azure Storage with AzCopy
- Set up to run every day (early morning)
Rendering
To install Overviewer, follow the instructions on the Overviewer Documentation.
To define what to render, I’m using the configuration file. My config file looks like this:
worlds["world"] = "home/me/path/to/minecraft/world"

renders["normal"] = {
	"world": "world",
	"title": "World",
	"rendermode": "smooth_lighting"
}

outputdir = "/home/me/path/to/output"
To run it:
/home/me/path/to/overviewer.py --config=/home/me/path/to/world.config
This generates the map as a website and saves it to /home/me/path/to/output. Once this is done (it takes a while) I upload it to an Azure Storage Account.
Rendering a copy
I found that if anyone is in the world when the render runs (and you’re rendering the live world file) the chunks people are working in can render incorrectly. Be careful when copying the map before rendering though, Overviewer uses the file modified dates to determine if chunks need to be re-rendered.
As recommended, I’m using the -p flag (I’m running this on Ubuntu) when copying to preserve modified dates. It seems to be working nicely. My copy command looks like this:
cp -p -r /home/me/path/to/minecraft/server/world/* /home/me/path/to/minecraft/world
Uploading
Set up the storage account
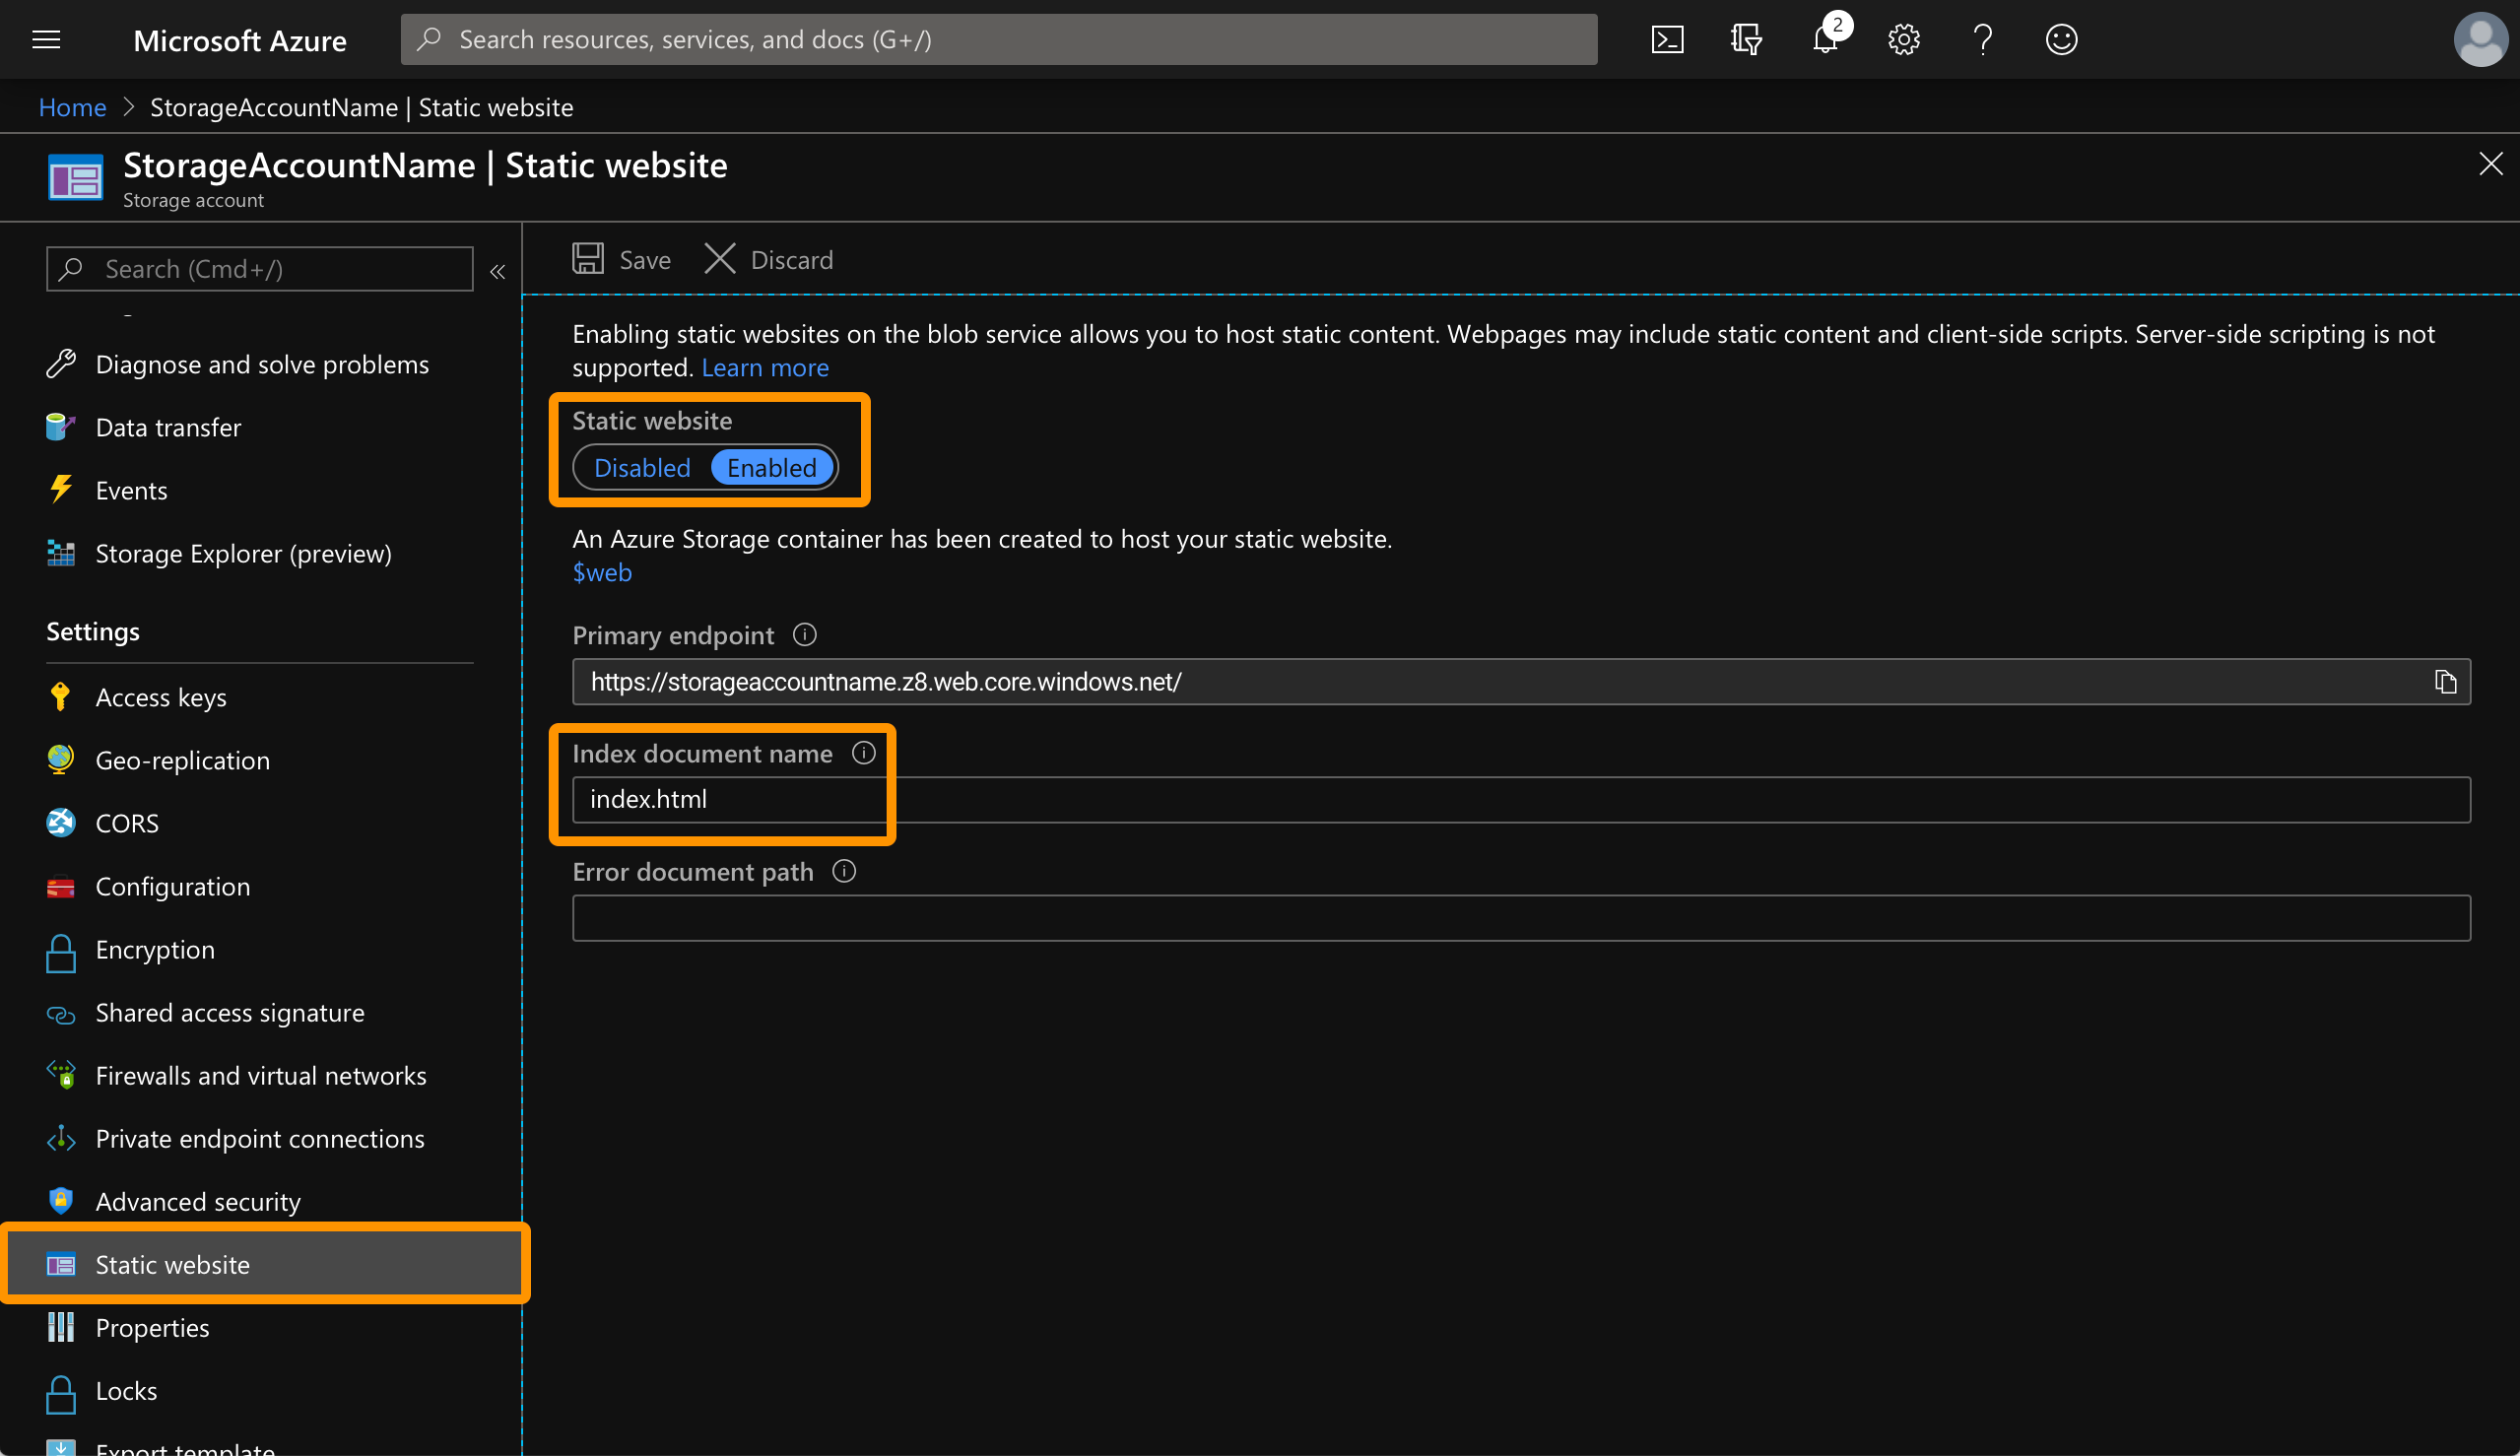
To enable the static website on the storage account:
- Open the storage account
- Select Static website
- Set static website to Enabled
- Enter index.html as the Index document name - this is the entry point for the website generated by Overviewer
- Click Save

Enabling this creates a new container named $web. This is where the Overviewer render files will be uploaded.
Authenticating with the storage account
I’ve made use of a System assigned managed identity for authenticating between the VM and the Storage Account. With this, I don’t have to manage any password or tokens - Azure manages this for me.
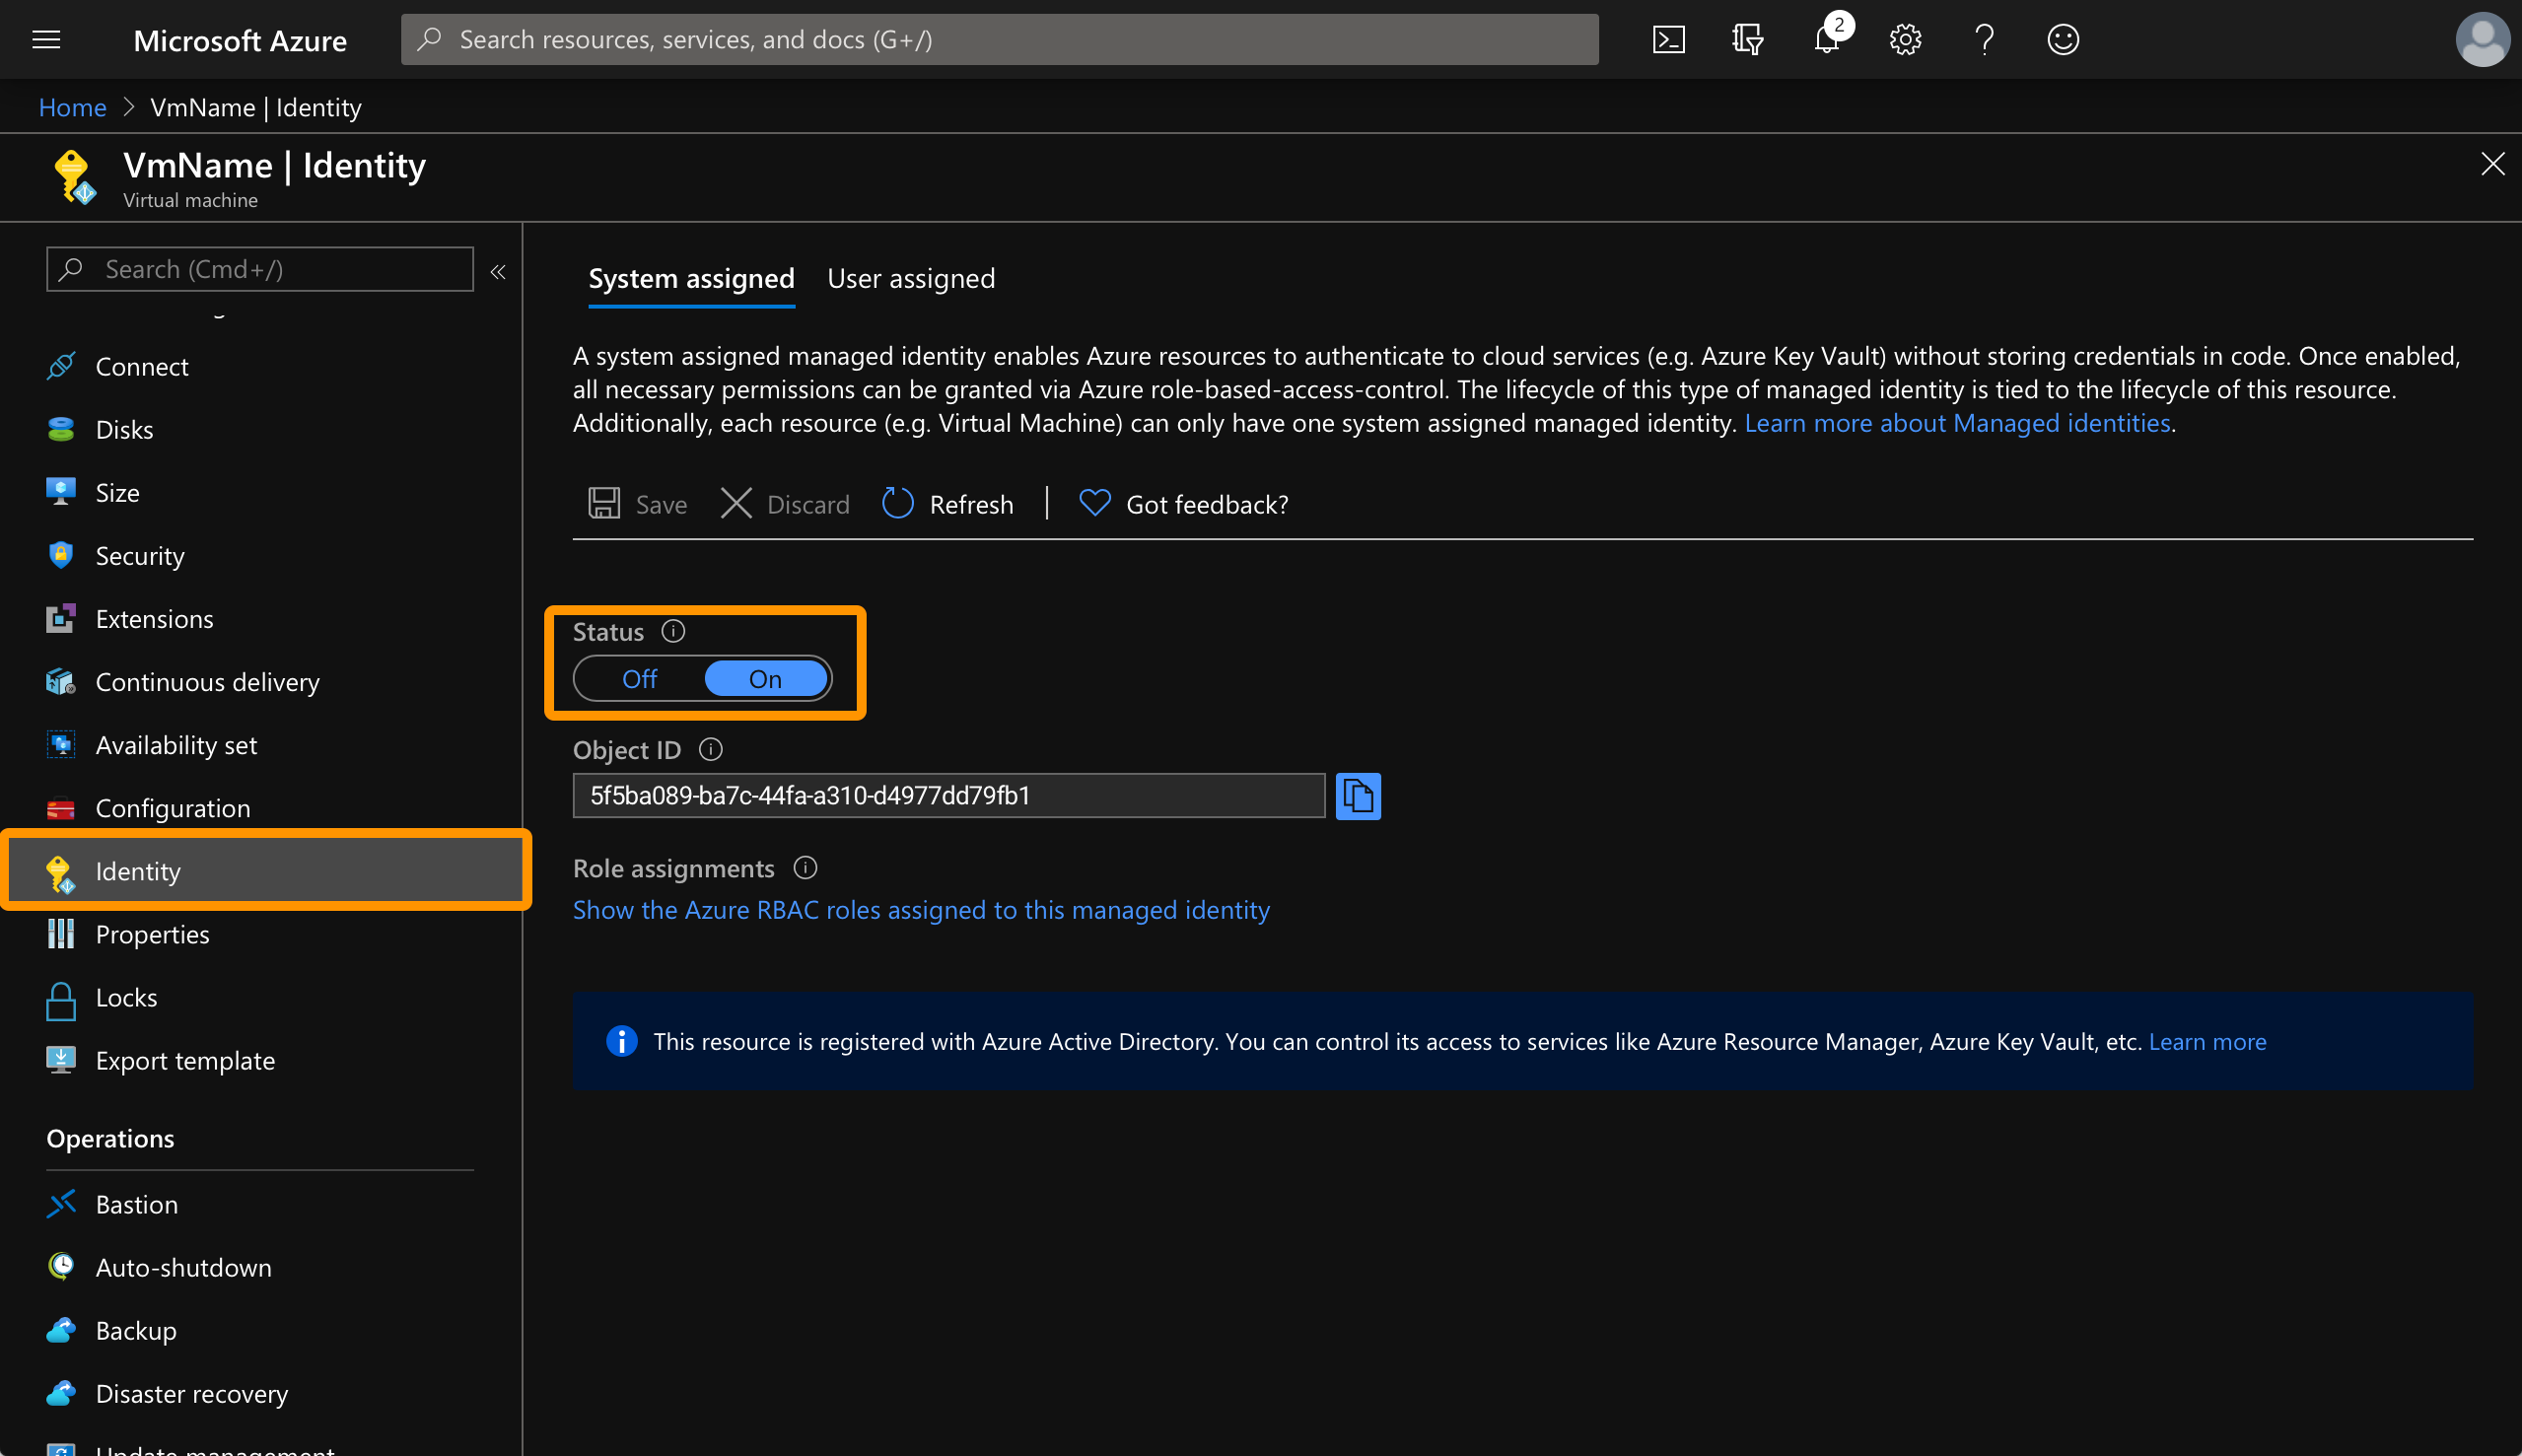
Enable managed identity
To set up the managed identity:
- Open the virtual machine page
- Select Identity
- Set status to On
- Click Save
This creates a new managed identity assigned to the virtual machine.

Set up storage account permissions
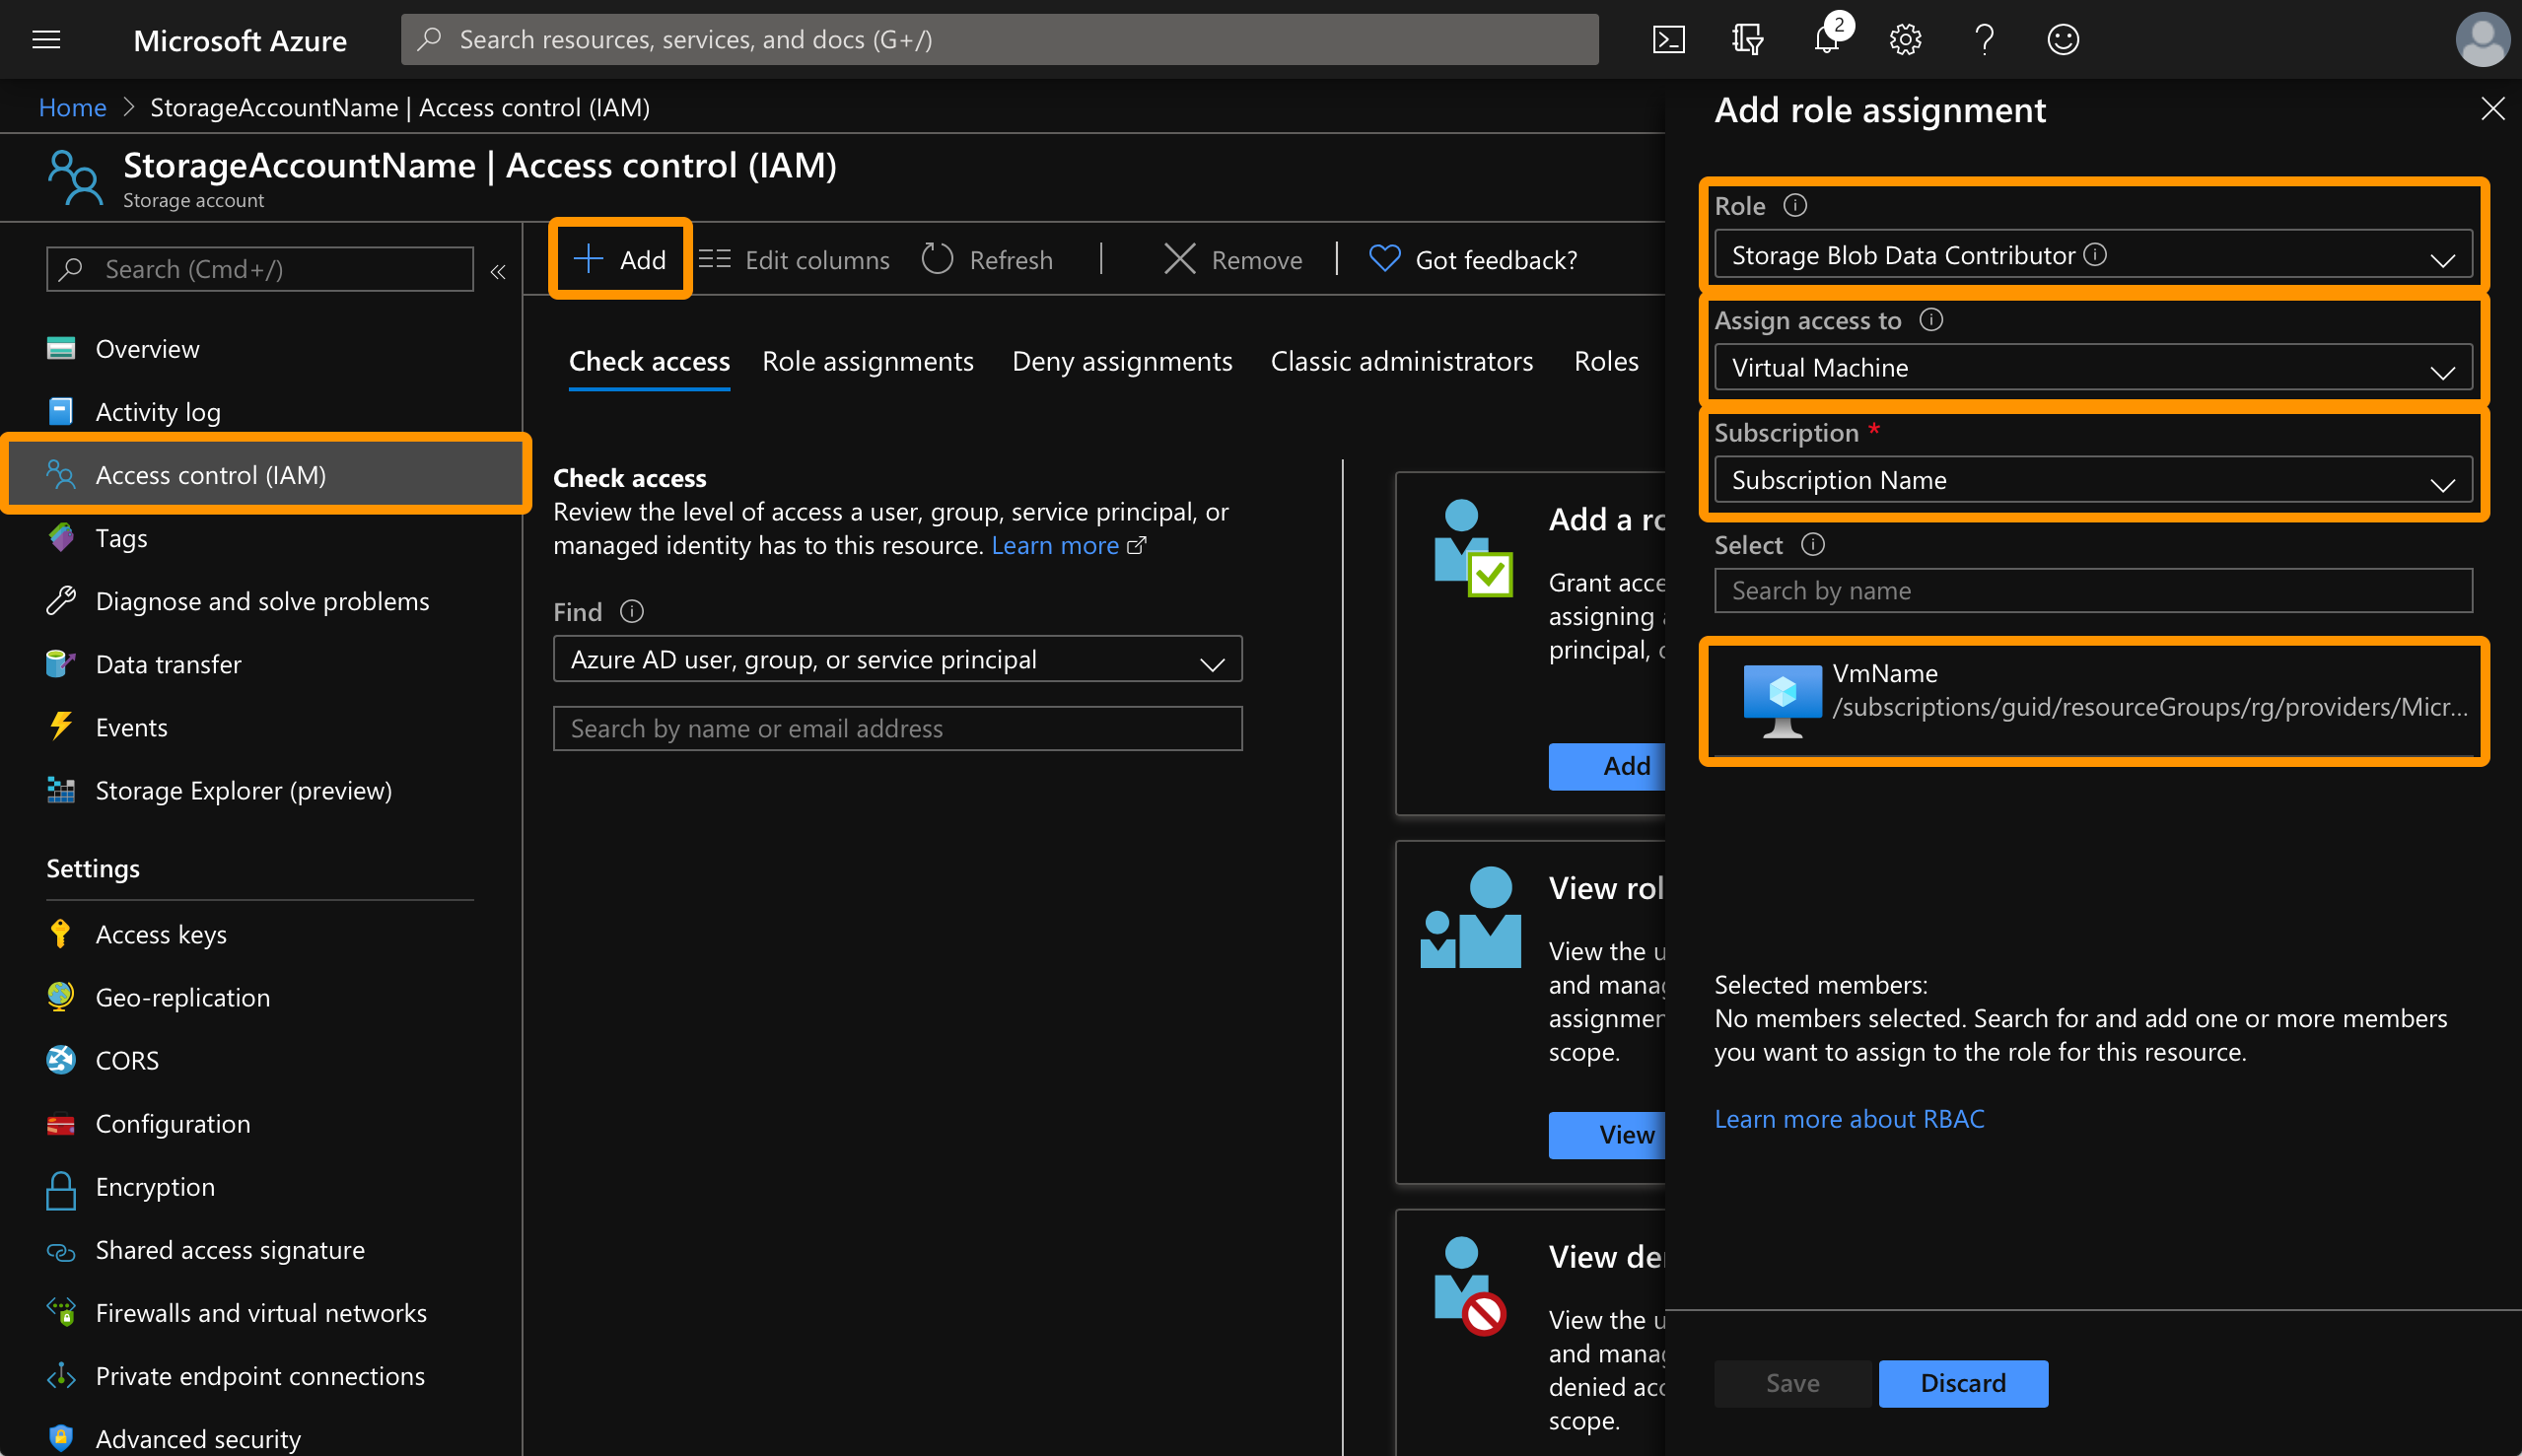
The identity that was just created can’t do anything. To give it permissions to upload to the storage account:
- Open the storage account
- Select Access control (IAM)
- Click Add > Add role assignment
- Select Storage Blob Data Contributor for Role
- Assign access to: Virtual Machine
- Select the subscription the virtual machine is in
- Select the virtual machine
- Click Save

The virtual machine will only show up in this list if it has a managed identity. If you try and do this step before you enable the managed identity you won’t see anything here.
Upload with AzCopy
Install AzCopy on the machine if you don’t have it yet.
It can take a few minutes for the role assignment to take effect. If you get permission errors when you run these next commands, just wait a bit. It took about 10 minutes to start working for me.
First, I run the login command:
azcopy login --identity
The --identity flag in this command tells AzCopy to log in using the System Assigned Managed Identity.
Next, upload the Overviewer output:
sudo azcopy sync --delete-destination true "/home/me/path/to/output" "https://<storage-account>.blob.core.windows.net/%24web"
I’m using the sync command so it uploads straight in to the container, rather than also copying the containing folder like copy does. I’m sure there is a way to get copy to not upload with the containing folder, but sync worked so I’m rolling with that.
Then it’s done. Navigating to the Primary endpoint that was shown on the Static website page of the storage account will show the map!
Bandwidth…
If you have the Storage Account and the VM in the same Azure region, the bandwidth for the upload should be free. That said, if enough people start viewing the map you could still end up with a pretty decent bandwidth.
Automating
This works great and all, but I don’t plan on logging in to run this every time I want to update the map, so I’ve automated it with cron. I’m way out of my depth with Linux anything, so I just followed this How To Add Jobs To cron Under Linux or UNIX guide.
In summary:
- Run
crontab -eto open the cron editor - Add
0 16 * * * /bin/bash -c /home/me/path/to/render-and-upload.shto run it every morning at 2am (I’m in AEST and machine is running in UTC, so 1600 UTC is 0200 AEST)
Overviewer is pretty resource-hungry. If you’re rendering on the same machine as the server, probably don’t run it when people are playing.
Script
The render-and-upload.sh script that does all the work looks something like this:
# Copy before rendering
rm -r /home/me/path/to/minecraft/world/*
cp -p -r /home/me/path/to/minecraft/server/world/* /home/me/path/to/minecraft/world

# Render
/home/me/path/to/overviewer.py --config=/home/me/path/to/world.config

# Authenticate
azcopy login --identity

# Clear the folder before uploading. Sync is meant to clear out files that should not be there, but I issues with sync detecting changes 100% and left the map looking strange.
sudo azcopy remove --recursive "https://<storage-account>.blob.core.windows.net/%24web"

# Upload
sudo azcopy sync --delete-destination true "/home/me/path/to/output" "https://<storage-account>.blob.core.windows.net/%24web"
And it’s done for real. Automated map generation and upload with no usernames, passwords, or tokens floating around.